As a theme developer, often the need arises to create a highly customised navigation menu. This is a little tricky to do if the customisation involves more than adding classes or text to the navigation links.
The wordpress navigation menu is generated by wp_nav_menu(), a number of arguments can be passed into this function to add some customisation to the output. In the below example I am passing in a menu location of ‘primary’ and a class of ‘main-nav’.
array(
‘theme_location’ => ‘primary’,
‘menu_class’ => ‘main-nav’,
));
These kinds of basic changes can be made to the menus fairly easily just by passing in more arguments, a full list of them that can be passed into this function can be found in the wordpress documentation.
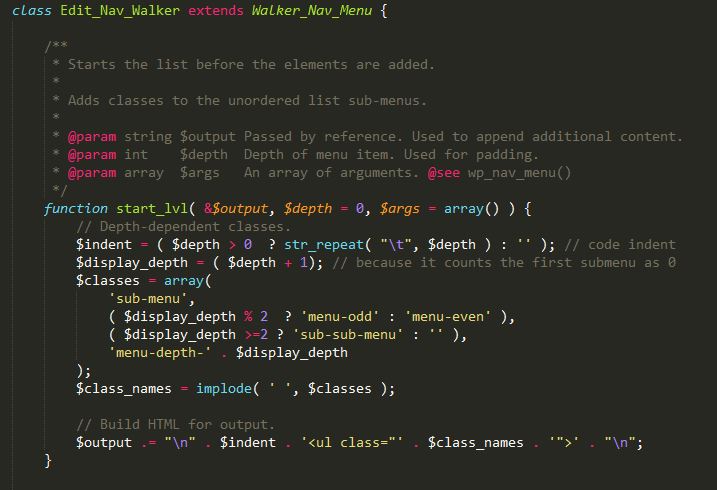
However, although the inbuilt function parameters give some freedom to the developer to customise the menu, often it is not enough. In order to have full control of the HTML output we have to extend the default nav menu walker class, and pass in the name of the class as the value of the ‘walker’ argument to wp_nav_menu.
array(
‘theme_location’ => ‘primary’,
‘menu_class’ => ‘main-nav’,
‘walker’ => new Main_nav_Walker()
));
The default class used by wordpres is Walker_Nav_menu, it is long and extensive and can be found in /wp-includes/nav-menu-template.php, the easiest way of creating a new walker class is by copying this existing class into your functions.php file and extending it according to the output you would like to produce. For example the function contains the following code for the HTML output:
$output .= $indent . ‘<li id=”nav-menu-item-‘. $item->ID . ‘” class=”‘ . $depth_class_names . ‘ ‘ . $class_names . ‘”>’;
This is where the <li> tags for each menu item are created with an id of ‘nav-menu-item’. If this line is removed from the new walker class then a menu will be generated with only <a> tags, hence removing the list style from the menu.
Another simple example would be to open the link in a new tab. This is done by setting the target attribute in your <a> tag to be ‘_blank’. The following code can be found in the existing function.
$attributes = ! empty( $item->attr_title ) ? ‘ title=”‘ . esc_attr( $item->attr_title ) .'”‘ : ”;
$attributes .= ! empty( $item->target ) ? ‘ target=”‘ . esc_attr( $item->target ) .'”‘ : ”;
$attributes .= ! empty( $item->xfn ) ? ‘ rel=”‘ . esc_attr( $item->xfn ) .'”‘ : ”;
$attributes .= ! empty( $item->url ) ? ‘ href=”‘ . esc_attr( $item->url ) .'”‘ : ”;
$attributes .= ‘ class=”menu-link ‘ . ( $depth > 0 ? ‘sub-menu-link’ : ‘main-menu-link’ ) . ‘”‘;
This builds the attributes to be passed into the menu link. To populate the target attribute, we can replace this code with:
$attributes = ! empty( $item->attr_title ) ? ‘ title=”‘ . esc_attr( $item->attr_title ) .'”‘ : ”;
//added target=_blank attribute to the link so that it opens in a new tab or window
$attributes .= ! empty( $item->target ) ? ‘ target=”‘ . esc_attr( $item->target ) .'”‘ : ‘ target=”_blank” ‘;
$attributes .= ! empty( $item->xfn ) ? ‘ rel=”‘ . esc_attr( $item->xfn ) .'”‘ : ”;
$attributes .= ! empty( $item->url ) ? ‘ href=”‘ . esc_attr( $item->url ) .'”‘ : ”;
$attributes .= ‘ class=”menu-link ‘ . ( $depth > 0 ? ‘sub-menu-link’ : ‘main-menu-link’ ) . ‘”‘;
And now the menu items will open in a new tab or window depending on your browser. This is useful for a navigation menu containing social media links.
There are many other ways that the HTML output of your wordpress nav menus can be changed, playing around with the walker function can produce some interesting and useful results when designing your website menus.